
How To Check Doorbell Transformer Voltage
/
Reading Doorbell Voltage
In this post we will teach you how to check your doorbell transformer voltage and provide you with common solutions to how to fix common doorbell wiring issues.
Why You Should Check Doorbell Transformer Voltage?
If you are planning on installing a smart doorbell it’s a good idea to check your doorbell transformer voltage before ordering or installing a smart doorbell so you can get the right smart doorbell that will work with your existing doorbell transformer voltage. Otherwise you might need to replace your doorbell transformer with a higher voltage doorbell transformer.
If you check your doorbell transformer voltage ahead of time you do have options for smart doorbells that can work with your existing doorbell wiring if you have a lower voltage transformer.
How To Check Your Doorbell Transformer Voltage
You will need a multimeter to check the doorbell transformer voltage. I prefer this multimeter, but both the of the two multimeters shown below will work for testing your doorbell transformer voltage. The main difference is that the more expensive multimeter is auto-ranging making it easier to use and has a few additional features.
Once you have your Multimeter you can test your doorbell transformer voltage by following the steps below.
Step 1: Use a screwdriver to remove your old doorbell from your house. Don’t disconnect the wires. Just pull the doorbell away from the house. Remember the wires are live so you don’t want to let them touch anything that might short circuit them and you don’t wan’t to touch them either. Doorbells use low voltage so it is safer than high voltage wiring but if you let the wires short circuit it could burn out your doorbell transformer.
You don’t need to remove the doorbell from the wiring. You can take a reading with your doorbell wiring still attached to your doorbell button, you just need access to take the reading.

Remove Doorbell To Check Transformer Voltage
Step 2: Turn on your multimeter and set it to AC (Alternating Current Voltage) look in your multimeter manual if you are uncertain how to do this but usually the AC Voltage is designated by a wavy line.

Multimeter setting for checking doorbell transformer voltage
Step 3: Now touch your multimeter probes to the separate doorbell terminals and take a reading. If you don’t get a voltage reading check to make sure your multimeter is on, and you have it set to the correct setting.
If you are still not getting a doorbell transformer voltage reading you will need to skip to the sections below for to troubleshoot your doorbell.

Doorbell Transformer Voltage Reading 21V
If you are getting a voltage reading from your doorbell wiring take note of the voltage and then you can choose a smart doorbell that will work with your existing doorbell transformer based on the doorbell voltage requirements below. If you have at least 10V of power there are smart doorbells that will work with your existing doorbell wiring.
Ring Doorbell Pro Voltage: Requirements
The Ring Pro Doorbell will work with doorbell transformers that provide between 16V and 24V. In my experience about 40-70% of homes have at least 16V at the doorbell.
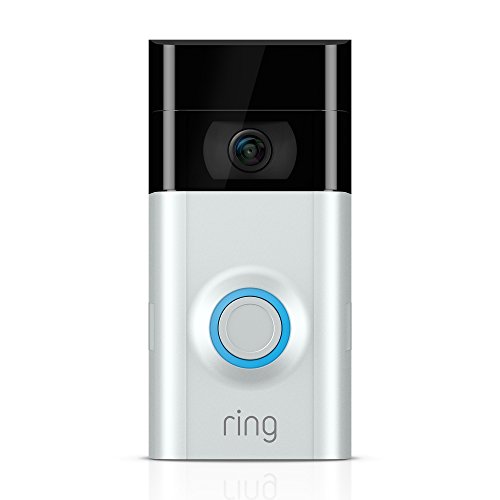
Ring Video Doorbell 2 Voltage Requirements
Ring 2 Voltage Requirements: 10V to 24V
The Ring Video Doorbell 2 is unique in that it has a removable rechargeable battery and can actually be used with hardwired wiring or completely wirelessly using the rechargeable battery. With the rechargeable battery you will eventually need to remove the battery and recharge it with the charger supplied with the doorbell. The disadvantage of using the rechargeable battery on it’s own is that you will get slower performance from the doorbell, and the footage may be a little less clear than if the doorbell is hardwired.
However if you have at least 10V of power going to your doorbell from your doorbell transformer it will provide enough power to keep the battery charged and you won’t need to charge the battery on the Ring 2 Doorbell as the 10V will keep it topped up.
When the Ring Doorbell 2 is connected to at least 10V of transformer power you will also experience increased performance and video quality from your Ring Doorbell 2 because it will have more power to transmit the video signals. If you only have 10V of power I highly recommend getting a Ring 2 because it won’t require you to replace the doorbell transformer but it will still give you good quality video doorbell footage.
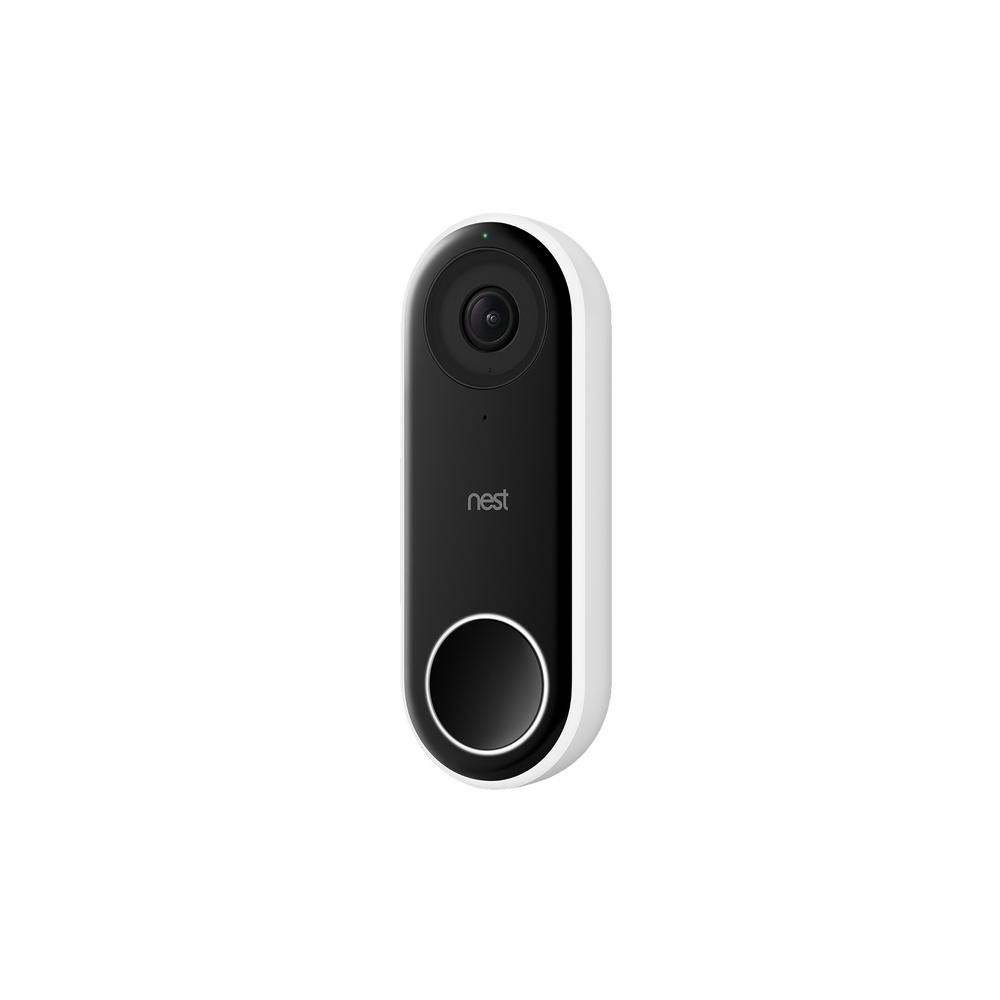
Nest Hello Voltage Requirements
Nest Hello Voltage 16-24V
The Nest Hello is another great option as a smart doorbell and works on the same app and ecosystem as the Nest Cameras and Nest Thermostat. The Nest Hello requires 16-24V of power to function properly and will display a yellow light around the doorbell button if it’s not getting enough power.
Related Post: Nest Hello Angle Mounting
Doorbell Wiring Troubleshooting
If you continue on through this post the doorbell wiring troubleshooting guide will cover fixing problems with both traditional doorbells and smart doorbells.
Doorbell Not Working: Common Causes
In general doorbell wiring problems typically caused by the issues or symptoms below.
Dead Doorbell Transformer
Burnt Out Doorbell Chime
Bad Wiring
Bad Doorbell Button
Not Enough Doorbell Transformer Voltage (Smart Doorbells)
Doorbell Wiring Troubleshooting Materials Needed
Multimeter - Having a multimeter is essential for troubleshooting doorbell wiring. It allows you to test the doorbell voltage and check the wiring continuity. There are value priced quality multimeters that you can find on Amazon. We recommend either of these two multimeters, but the Auto Digital Multimeter is easier to use than the Standard Digital Multimeter.
Screwdriver - Having a 6 in 1 screw driver is helpful for all home improvement tasks but you will need this to work on the transformer or remove the doorbell.
Wire Nuts -These are for connecting the doorbell wires or doorbell transformer wires.
Doorbell Doesn’t Work: Troubleshooting Start Here
If your doorbell doesn’t work it could be caused by any of the items we listed above but were going to start with the simplest items to diagnose and their solutions. Then work through less common problems and solutions.
Below I’ve provided standard doorbell wiring diagram so you can see how a doorbell is typically wired. it helps visualize the doorbell wiring troubleshooting process.

Doorbell Wiring Troubleshooting Diagram
Doorbell Button Troubleshooting
If when you press the doorbell nothing happens it means that either you doorbell isn’t getting power, the doorbell button is bad, or the chime is bad. To test a doorbell button all you need to do is remove the doorbell and use your multimeter to get a voltage reading. If you see that you have consistent voltage in the 10-24V range it means most likely that the either the doorbell button or doorbell chime or both of them are bad.

Remove the doorbell button and test the voltage at the doorbell wires
If you get no voltage reading on the multi meter it means that the doorbell chime, doorbell wiring or doorbell transformer are bad. You will need to skip down to the next section for doorbell wiring troubleshooting.
You can confirm that the doorbell button is what is broken by removing the wires off the back of the doorbell and pressing the two wires together. If your indoor chime rings it means that your doorbell button is bad.
If your indoor chime does not ring or it buzzes then your doorbell chime is bad.
You can confirm that the button is broken or not working by switching your multimeter to continuity mode. Continuity mode tells you if you have a continuous path or circuit from one probe to another. You attach a multimeter probe to each end of the doorbell button.
You should get no reading or buzz when the doorbell is not being pressed then when you press the doorbell you should hear a beep or buzz and the meter should read continuity. If the meter is beeping or buzzing and reading continuity the doorbell button is good. If you get no beep or buzz or continuity reading from your multimeter it confirms that the doorbell button is broken.
If your doorbell button is working and will chime your doorbell chime but your doorbell light is not working it most likely means that the doorbell light is burnt out and you can just replace the entire button with a new doorbell button. We recommend using this lighted button or you can scroll below for other doorbell buttons we recommend.
Broken Doorbell Button
If you only need to replace your doorbell button I recommend investing in a smart doorbell like the Ring Pro Doorbell, Ring 2 Doorbell or Nest Hello. For a smart doorbell to work it’s best if you have a least 16V of electricity making it to the doorbell button. If this is the case your system is most likely compatible with a smart doorbell.
If you don’t want to install a smart doorbell you can just replace your exiting doorbell button with a simple doorbell button or any of the doorbells buttons I have recommended in the graphic below.
Broken Doorbell Chime

Doorbell Chime Troubleshooting
If you detected voltage at the doorbell and confirmed that the button is working but the chime is not chiming or it’s buzzing it most likely indicates that your doorbell chime is bad and you will need to replace it.
Because it cost’s the same to install a doorbell chime that is future compatible with a smart doorbells as it does to get a non compatible chime, I highly recommend choosing smart doorbell compatible chime from our list of smart doorbell compatible chimes. If you get a smart doorbell compatible chime it will always allow you to upgrade your doorbell in the future and you’ll be happy you took the time to choose the right doorbell chime.
If you don’t want to read all the entire post on recommended doorbell chimes either of the chimes listed below are great options that can replace your existing doorbell chime.
Replacing a doorbell chime is simple. You remove the doorbell chime cover and it will expose the electrical wiring inside. Before you start removing any wiring you should turn off the power to the doorbell at the circuit breaker. If you’re uncertain as to which circuit the doorbell is on you can turn off the whole panel if you wish because replacing a doorbell chime is a relatively quick process.

Doorbell Chime Troubleshooting
Doorbell Chime Installation
I recommend taking a picture of the existing doorbell wiring and mark the wires with a marker or electrical tape so you know which wire was on each terminal of the doorbell. Loosen the existing doorbell chime wiring terminals and remove the wires.
Remove the existing doorbell chime from the wall.
Now install the new doorbell chime. The wires typically route through a hole in the back side of the doorbell chime.
Wire the two wires to the same terminals they were originally wired to on your old doorbell chime. Use the photograph to determine which wire was on which terminal.
Turn the power back on at the circuit breaker. Your doorbell should now chime with the new doorbell chime installed.
Doorbell Transformer Troubleshooting
If you aren’t getting a power reading from the wires at your doorbell when you use your multimeter to measure the voltage it most likely means that your doorbell transformer is dead. The other possibility is that your wiring is bad is either disconnected or shorting out.
You can determine if the issue is with your wiring or your doorbell transformer by testing the voltage at your doorbell transformer.
We’ve written a guide on where to find your doorbell transformer but the most common locations that you will find your doorbell transformer are near your HVAC equipment, in your garage or near your main electrical panel.

To do this you will need to locate your doorbell transformer and then put your multimeter probes on each doorbell transformer terminal to take a voltage reading. Make sure your multimeter is set to AC or Alternating Current mode when taking the reading.
If you get a no voltage reading on your doorbell transformer or it is less than 10V it means that your doorbell transformer is burnt out or dead. If this is the case you will need to replace your doorbell transformer. Skip below to the next section to learn about how to replace a doorbell transformer and which doorbell transformer you should use.
If you get a reading between 16-24V your doorbell transformer is most likely putting out enough power for your doorbell and the issue is that your doorbell wiring is either broken or shorted out between your transformer and your doorbell. This means that you will need to install new wiring for your doorbell. Or you could install a completely wireless battery powered smart doorbell like the Ring 2 Doorbell with a Ring Wireless chime. Installing a wireless battery powered doorbell is typically less work than running new doorbell wiring which can involve painting and patching your walls.
Replacing A Doorbell Transformer
If you got a reading of no voltage from your Doorbell Transformer you will need to replace it. We recommend replacing your doorbell with 16V -30VA Hardwired Transformer if you are going to replace it with another hardwired transformer. This is because a 16V -30VA transformer has enough power for a smart doorbell if you choose to upgrade to a smart doorbell in the future. Below is the hardwired doorbell transformer we recommend.
You also have the option of replacing your existing doorbell with a plug in transformer if you don’t feel comfortable with electrical wiring. With the plug in transformer it just plugs into an existing outlet and then you remove the doorbell wires from the old transformer and wire them the new plug in transformer. We’ve listed our recommended plug in transformer that is compatible with standard doorbells and smart doorbells.
Wiring A Doorbell Transformer
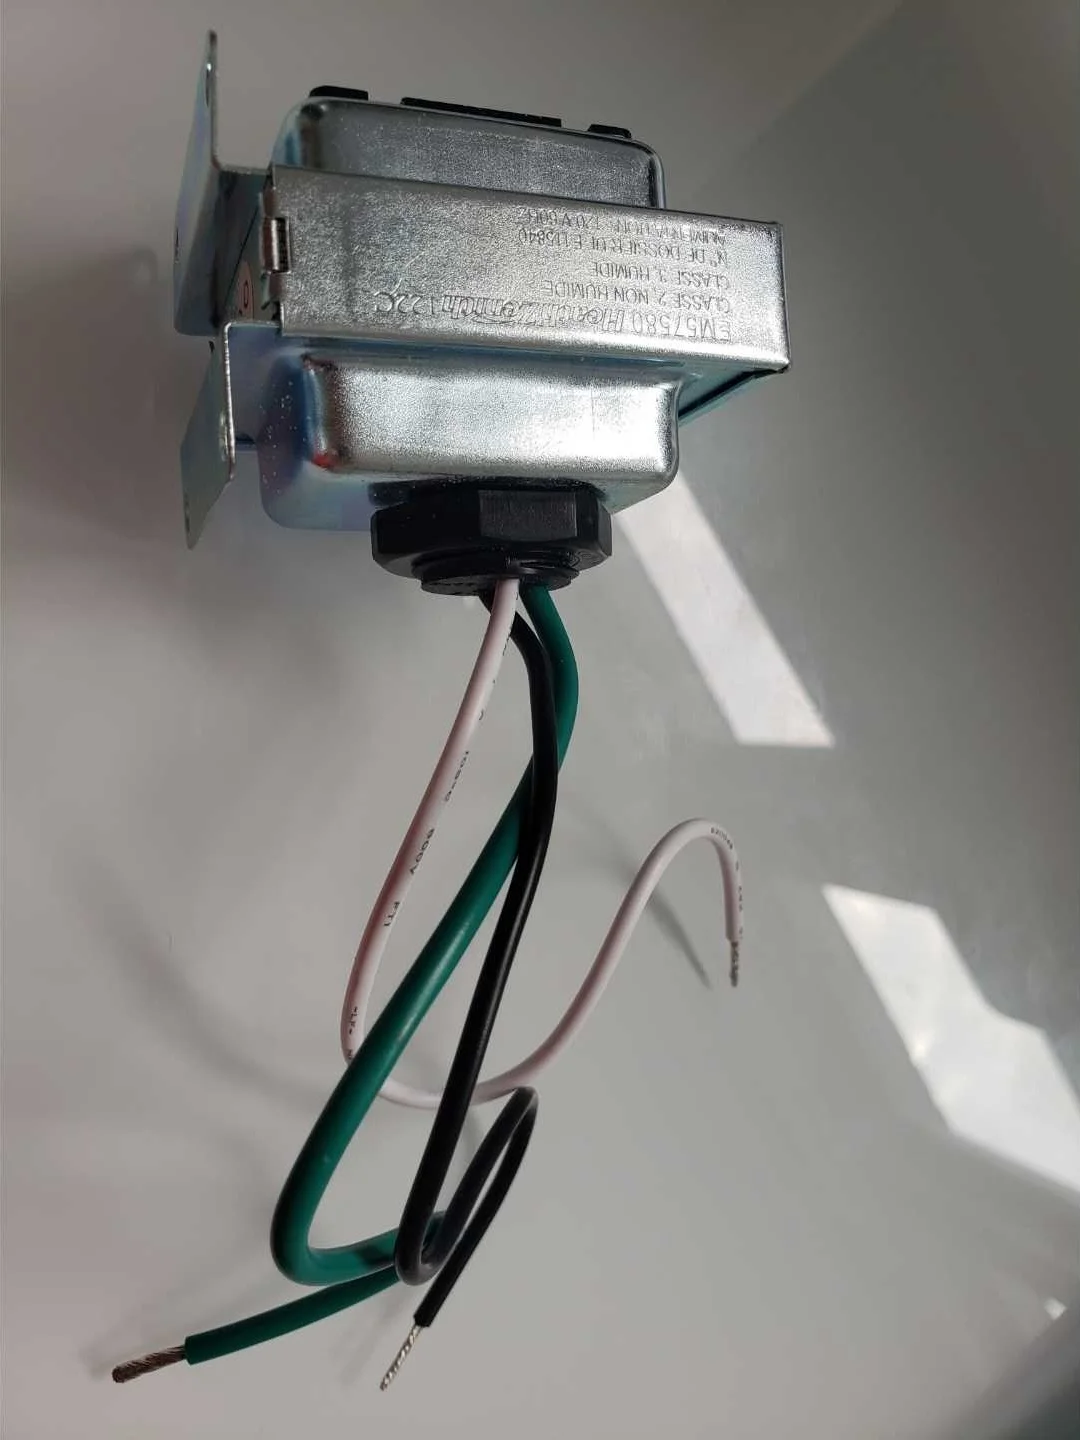
Wires that you will need to connect to install a doorbell transformer.
If you choose to replace your existing hardwired doorbell transformer you will need to do the following to install a new doorbell transformer.
Turn off the power to the doorbell transformer at the circuit breaker. Since your exiting doorbell transformer is not working you won’t be able to tell if the power is off. So it’s best to just turn off the main power at the circuit breaker to your home unless you know what circuit your doorbell transformer is wired too.
Remove the existing doorbell wires from the doorbell transformer.
Remove the existing doorbell transformer from it’s mounting location and gently pull out of the electrical box to expose the wiring. Take a picture of the wiring.
Disconnect the doorbell transformer wiring from inside the electrical box.
Wire the new doorbell transformer to the existing electrical box wiring and use the same color wires that you took a picture of to match each doorbell transformer wire to the correct wire in your junction box. The black wire is the hot wire, the white wire is the neutral wire and the green wire is the ground wire. Secure the wiring with wire nuts.
Install the doorbell transformer on its mounting plate and secure to the electrical box.
Wire the doorbell transformer wires to the two electrical terminals on the front of the doorbell transformer.
Turn the power back on. Take a reading at the doorbell transformer to confirm it is working and test your doorbell.
Doorbell Transformer Not Enough Voltage
If you are planning on installing a smart doorbell your doorbell transformer will need enough voltage to power the smart doorbell. Most smart doorbells like the Ring Pro and Nest Hello work best with 16V of power or more. If you don’t have enough voltage you will need to replace your doorbell transformer per the steps above using a recommended doorbell transformer like this 16V-30VA doorbell transformer available on Amazon.
If you have more than 10V but not 16V you can use the Ring 2 Doorbell which can operate completely wirelessly with rechargeable batteries but will stay charged and won’t require you to recharge the batteries if you have at least 10V of electricity available at your doorbell.
Smart Doorbell Wiring Troubleshooting
We’ve included our specific posts that detail solutions to the problems below for smart doorbells if you know the issue you are having with your smart doorbell. The links below are full posts detailing smart doorbell troubleshooting solutions not just links to products.
Doorbell Chimes That Work With Ring Doorbells
Doorbell Chimes That Work With Nest Doorbells
Where To Find Your Doorbell Transformer
Doorbell Transformers For Ring Doorbells
Doorbell Transformers For Nest Doorbells
Plug In Transformers For Ring Doorbells
Plug in Transformers For Nest Doorbells


