Nest Thermostat Battery
/
Diagnosing a Nest Thermostat Low Battery
If your Nest Thermostat is showing a low power error or the Nest Thermostat Battery is low there is a simple fix that probably does not require you to replace the battery on the Nest Thermostat.
Typically if you are getting a low power error on your Nest Thermostat or you have a low battery on your nest thermostat is means that you need to add a Common Wire or C wire to your Nest Thermostat wiring. Below I will teach you how to troubleshoot your Nest Thermostat Battery install a Nest C wire if needed.
It is very rare that you would need a Nest Thermostat battery replacement which is more difficult than installing a common wire and it’s much more likely that you just need to add a common wire which is a relatively simple solution.
This post covers the Nest Thermostat battery but if you are looking for replacement batteries for your other Nest products like the Nest Lock and Nest Smoke Detector you can read our post on nest replacement batteries for other nest devices.
Nest Low Battery
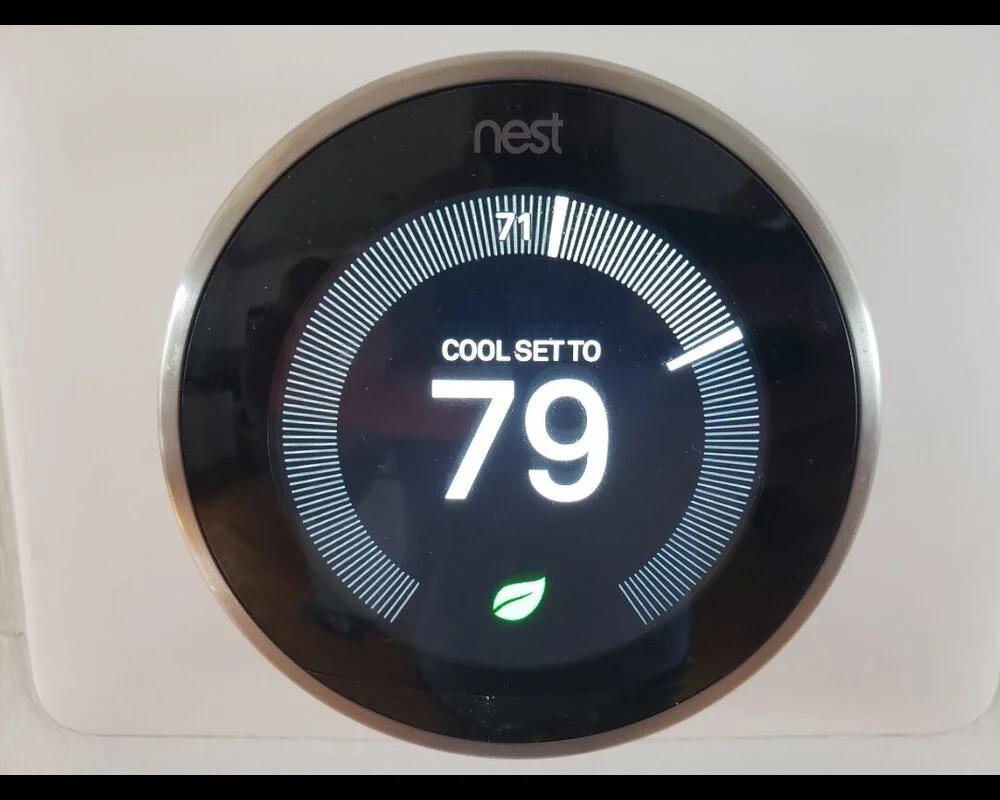
A typical reading for a Nest battery voltage when working properly is over 3.6V which is the bare minimum for the Nest Thermostat to operate. The voltage should be higher once the Nest Thermostat has been installed for 24 hours or more.
My Nest Thermostat battery voltage reads about 3.8V or more and works perfectly. You can find your Nest Thermostat battery voltage by going to the settings menu, clicking on the technical info section and then selecting the power menu.
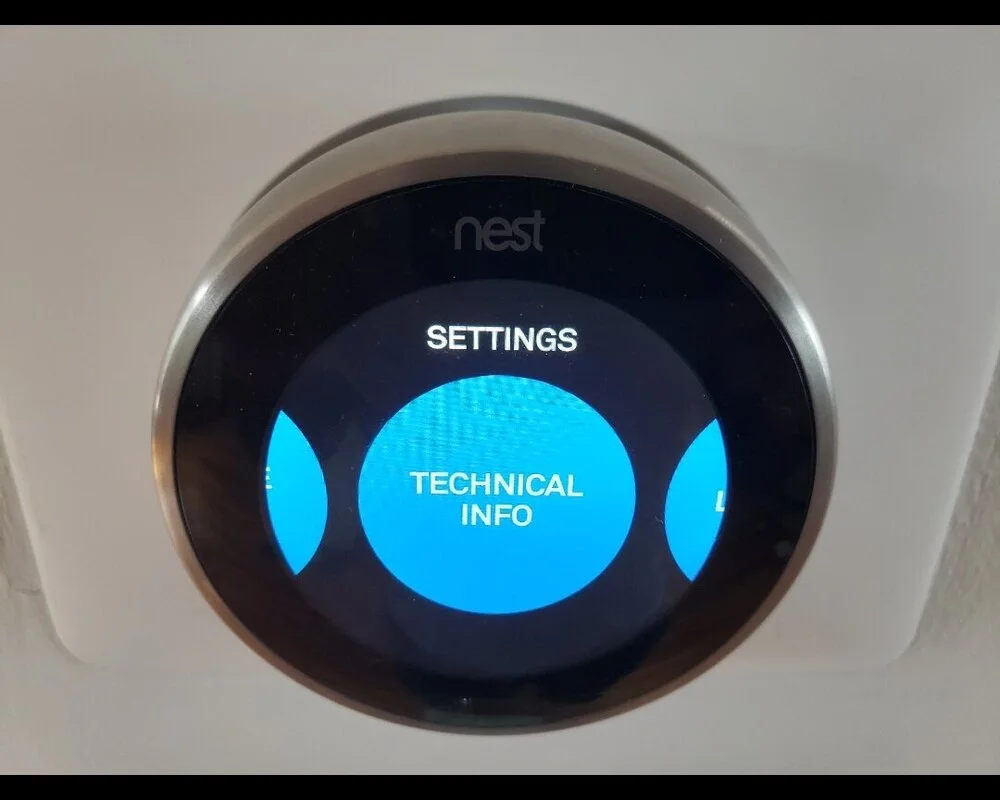
Nest Thermostat Battery Voltage Is Under Technical Info Menu
Which will then display information on your nest thermostat battery voltage and nest power parameters. It’s also a good idea to scroll down in the power menu by looking at the Lin voltage. If it is 20 or lower it could indicate you need to add a common wire. Scroll down to learn how to install a common wire. We recommend using a common wire transformer like this one to solve Nest low Battery issues.
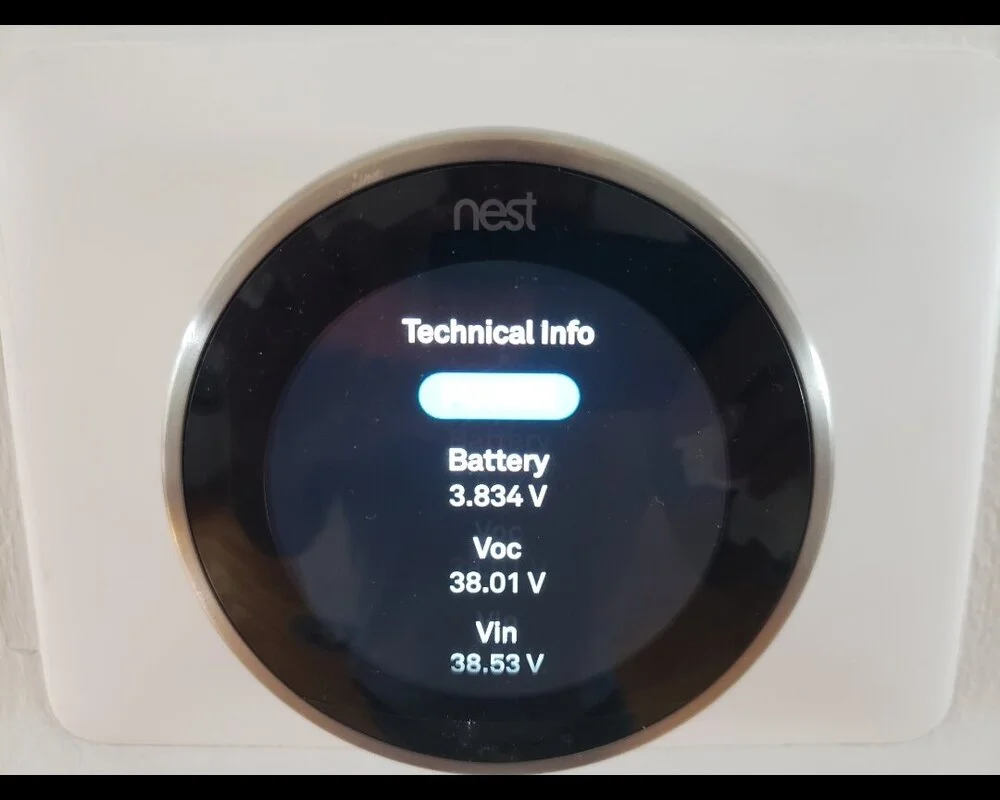
Nest Thermostat Battery Voltage
Test Your Nest Battery
You can confirm that your Nest Thermostat battery is working properly by removing the Nest Thermostat from the wall and charging it with a usb micro b cable. If the Nest charges up, or turns on while charging it means that the Nest is working properly and the Nest battery is charging but your HVAC system doesn’t have enough power to keep the thermostat charged. This means you will need to add a common wire. The picture below shows the Nest charging port on the back of the Nest Thermostat.

Nest Thermostat Battery Won’t Charge
If your Nest Thermostat battery won’t charge while it is on the Nest base plate there could be one of several issues. Your HVAC system might not put out enough power in which case you will need to add a common wire. Or the Rc or Rh wire which provides power to your Nest Thermostat might be loose, it’s a good idea to turn the power off, and check to make sure your Rc or Rh wire is secured properly in the Nest Thermostat base plate.
If your Nest Thermostat battery won’t charge it could also indicate and issue with your HVAC system. It could mean that you have a blown HVAC fuse or that your HVAC system is detecting an issue and shutting down. It’s a good idea to check the HVAC fuse on your furnace to make sure that its not blown. Typically HVAC systems use 3 AMP fast acting fuses like these.
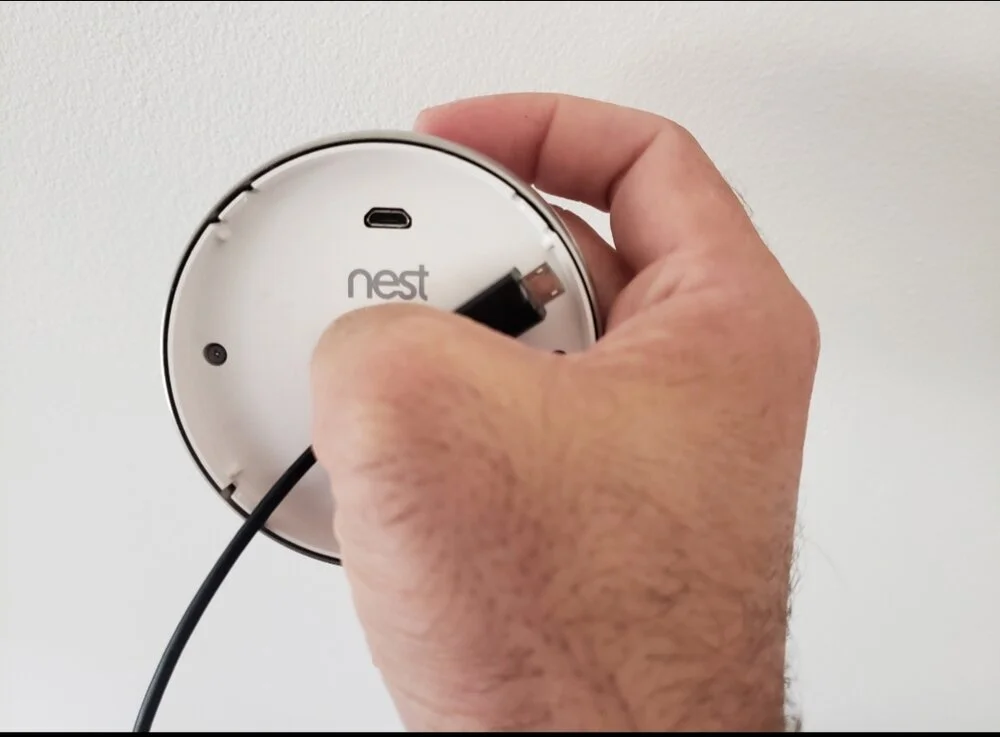
Charge The Nest Thermostat Battery With The Built In Micro USB B charging port.
If the Nest Thermostat is completely dead, you should take it off the base plate, and attempt to charge it using the usb micro b cable port on the back. If it turns on and charges or blinks it means that the Nest Thermostat is working properly and your HVAC system isn’t providing enough power and you need to add a Nest Common wire to your system or check to make sure that your HVAC system is working properly.
It is very rare that your Nest Thermostat battery is the issue and that you need to a Nest Thermostat battery replacement. I would try adding a common wire first before replacing the battery, and installing an old non smart thermostat first to confirm your HVAC system is actually working before replacing the Nest Thermostat battery. You could even test your HVAC system by wiring your R wire and W white wire together with the thermostat off to confirm the system is turning on.
However if you exhaust all other options you can replace the Nest Thermostat battery with this replacement battery available on amazon. Please scroll down below to see the video procedure on replacing the battery.
Nest Thermostat Battery Life
If you’re Nest Thermostat is getting sufficient power from your HVAC system your Nest Thermostat battery should last for years without any issue. There are people with Nest THermostats from 2013 with the original battery that is still going strong. Theoretically if your Nest Thermostat is getting enough power from the HVAC system the battery could last the lifetime of the thermostat.
If your Nest Thermostat is not getting sufficient power the Nest Thermostat battery life is typically a few hours too a day or two at which time the Nest will shut down and no longer control your HVAC system.
Nest Thermostat Battery Replacement
I don’t recommend replacing your Nest Thermostat battery until you have added a common wire per the instructions below and you have completed troubleshooting the Nest. If you are certain that it is you need a Nest Thermostat battery replacement then you can proceed with replacing the Nest Battery.
To do so you will need to first purchase a nest replacement battery which are available on amazon and is shown below.
Then you will need to turn the power off to your HVAC system and remove the Nest Thermostat from the wall. You can then remove the screws from the back side of the nest to expose the battery and circuit board. You can remove the battery and install the new Nest battery and reinstall the backside cover plate.
Reinstall the Nest Thermostat and turn the HVAC power back on. The video below shows how to install the Nest Thermostat Battery. The procedure for replacing the Nest Battery is similar for both the Gen 2 and Gen 3 Nest Thermostat.
Common Wire Installation
Below we teach you how to install a Nest Common wire so you can get your HVAC system back up and running in no time. The methods we teach below offer solutions for every situation so you can get your HVAC system up and running. A Common Wire, which can also be called a C wire is used to provide a continuous power source to your Nest Thermostat so that it’s internal battery always stay’s fully charged. Not all HVAC systems require the Nest Thermostat to be connected to a C wire but some do. Typically you won’t know if your HVAC system needs a C wire until you already have the Nest Thermostat installed. If you are getting low power warnings on your Nest Thermostat or low power errors displayed it typically means that you need to add a C wire to provide continuous power for your Nest Smart Thermostat.
How To Get Temporary Heating and Cooling While Waiting To Install C Wire
If this is an emergency and your Nest Thermostat has quit working because you need a Common wire you have a couple of quick solution options. You can take the Nest Thermostat off and charge it using an android USB Micro B style charging cable and plug it into a phone charger to charge up the internal battery on the Nest Thermostat. In most cases charging the Nest Thermostat battery will give you 1 - 2 more days of time to wait for parts to arrive for installing a common wire for your Nest Thermostat.
The solutions we offer for adding a common wire work for both the standard Nest Thermostat and the Nest E Smart Thermostat.
Any of the options below should allow you to add a C wire to your Nest Thermostat however option #2 using a Nest Thermostat C wire transformer is often the easiest option because it does not involve any wiring inside your HVAC unit.

How Install A Nest Common Wire: Options
Run new wiring from the HVAC system to the Nest Thermostat
Install a Common Wire Transformer
Hire an HVAC Professional
Install a Common Wire Resistance Device
Use the Fan Wire as a Common Wire
Option 1: Install a Nest Common Wire - Run New Wiring
Difficulty: Hard
If your Nest Thermostat is located near your HVAC system this can be an easy task because all you need to do is run new wiring from your Nest thermostat to your HVAC system. However if your HVAC system is not located near your thermostat it will most likely require you to run new wiring through your walls from the HVAC system to the thermostat.
If you plan on running wiring from your HVAC system to the Nest Thermostat we recommend using 8 wire thermostat wire as that will provide you the most flexibility in future installations. You need to have 1 extra wire for the common wire on the nest thermostat. So if your system uses 5 wires you need +1 or a six conductor wire. If your system uses 7 wires you need + 1 or a 8 conductor wire. Having extra wires does not hurt anything so it’s best to be safe and use 8 conductor wire which should work for 99% of applications.
You will need to find a routing method to add the Nest Thermostat C wire from your HVAC system to your Nest Thermostat.
Step 1: Nest C Wire Installation Determine Wire Path
Determine routing method, do you have a straight shot to your Nest Thermostat? Can you drill a hole from where the thermostat is located to the HVAC system? Or do you need to plan on routing the wires through the wall. If you plan on doing this it’s best to try and run the wiring in unfinished basement space or an attic to easily pull the wire. You will then need to drill a hole underneath where the thermostat is located or look for the existing thermostat wire. If there are no in wall obstructions you can sometimes tape the new wire to the old wire and just pull the old wire out with the new one attached. This will only work if you don’t have any in wall obstructions.
If you will need to fish the wires through walls getting a set of wire fishing rods and a drywall saw or multi tool to cut holes in the drywall will be helpful. I always recommend using a multi tool like the Milwaukee Multi Tool I have because it makes patching quick and easy with it’s clean cuts. You can use the cutout as a patch for the hole you made in the drywall.
Step 2: Nest Common Wire Installation Run Wire
In this step you will need to run the wire, using the methods you have available. If you are trying to pull the new wire by pulling out the old one you should take pictures of the existing connections on your HVAC system and your thermostat before you start. Make sure you tape the two wires tightly together but do not increase the profile of the wire or use so much tape that it will get snagged. This does not work in all instances and you need to work slowly and carefully.
Step 3: Nest Common Wire Installation HVAC Wiring
With the wire now pulled you will need to reconnect the wires at your HVAC equipment. Make sure the equipment is off, you can do so typically by turning it off either with a switch on the side of the unit or at the circuit breaker. Take the cover off, and look for the circuit board. On the circuit board there will be different terminals labeled R, W, Y, G, C. See the pictures below. You will now require the terminals as they you had them before and use the picture you took to re-wire proper HVAC terminals. This time with the extra wire you installed you will wire one of the wires to the C wire on the HVAC system. Take note of the wire color that you placed on the C terminal in the furnace.
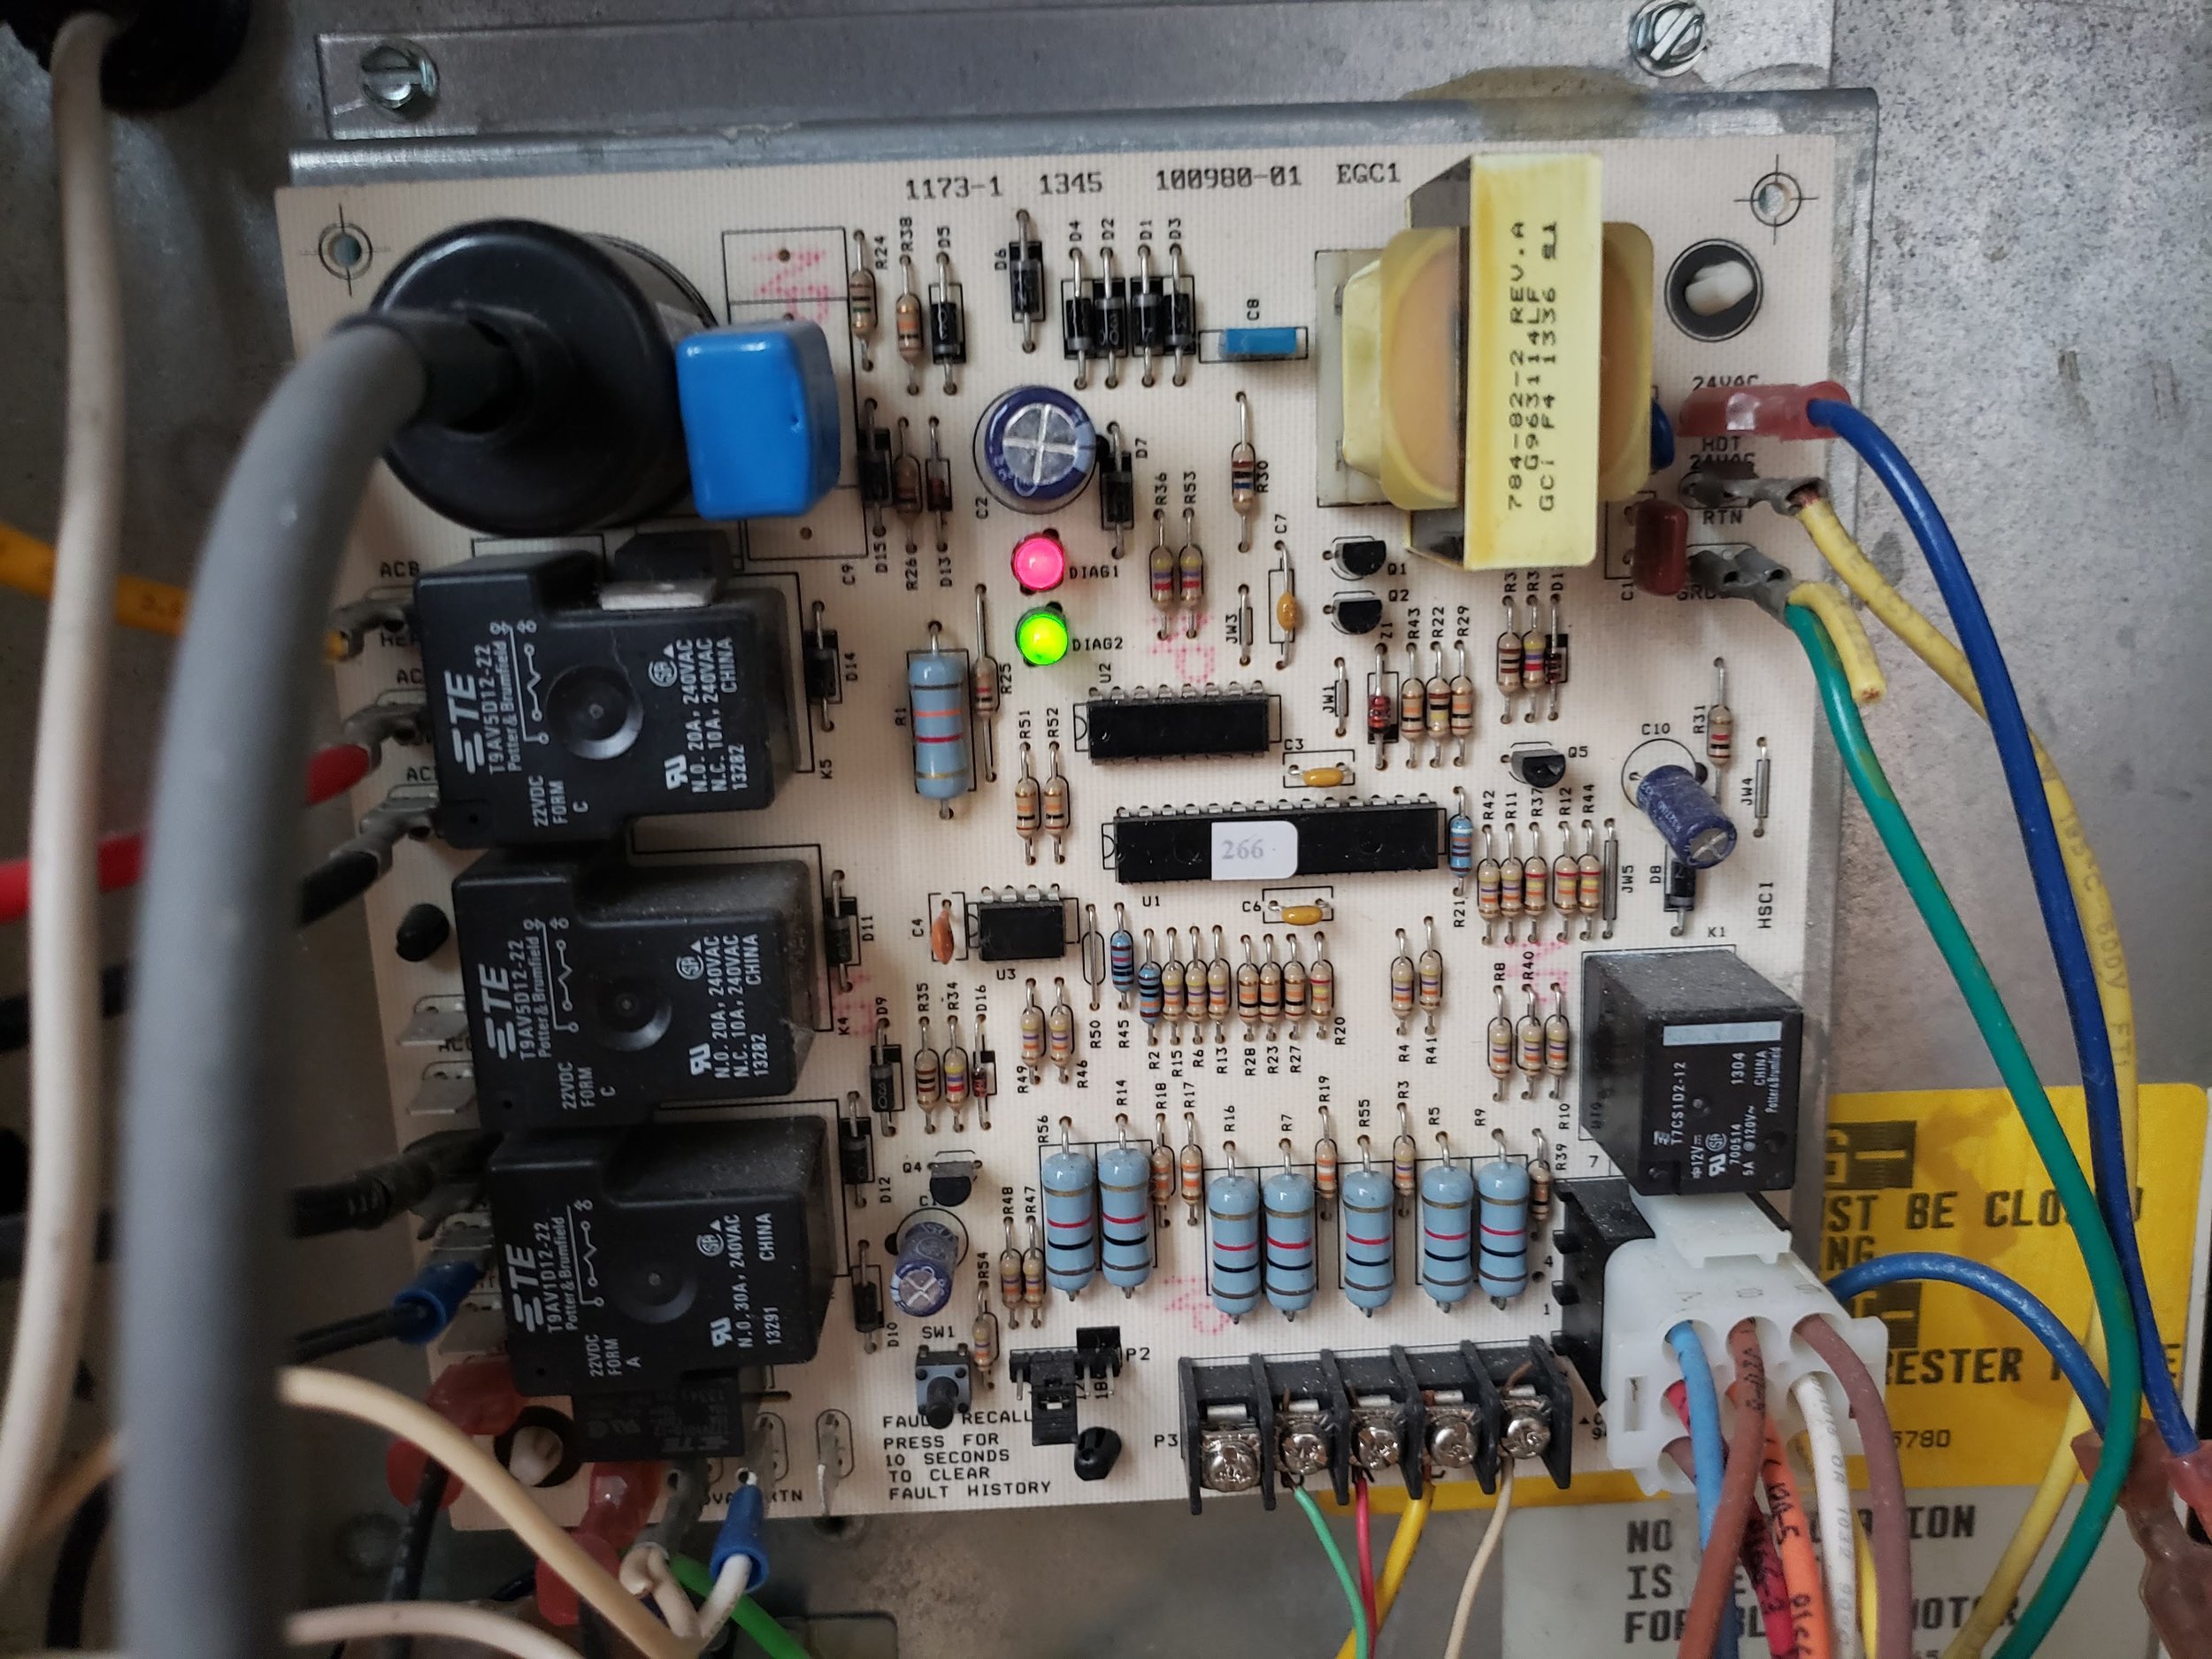
Example of a thermostat circuit board showing the terminals located at the bottom right fo the picture.
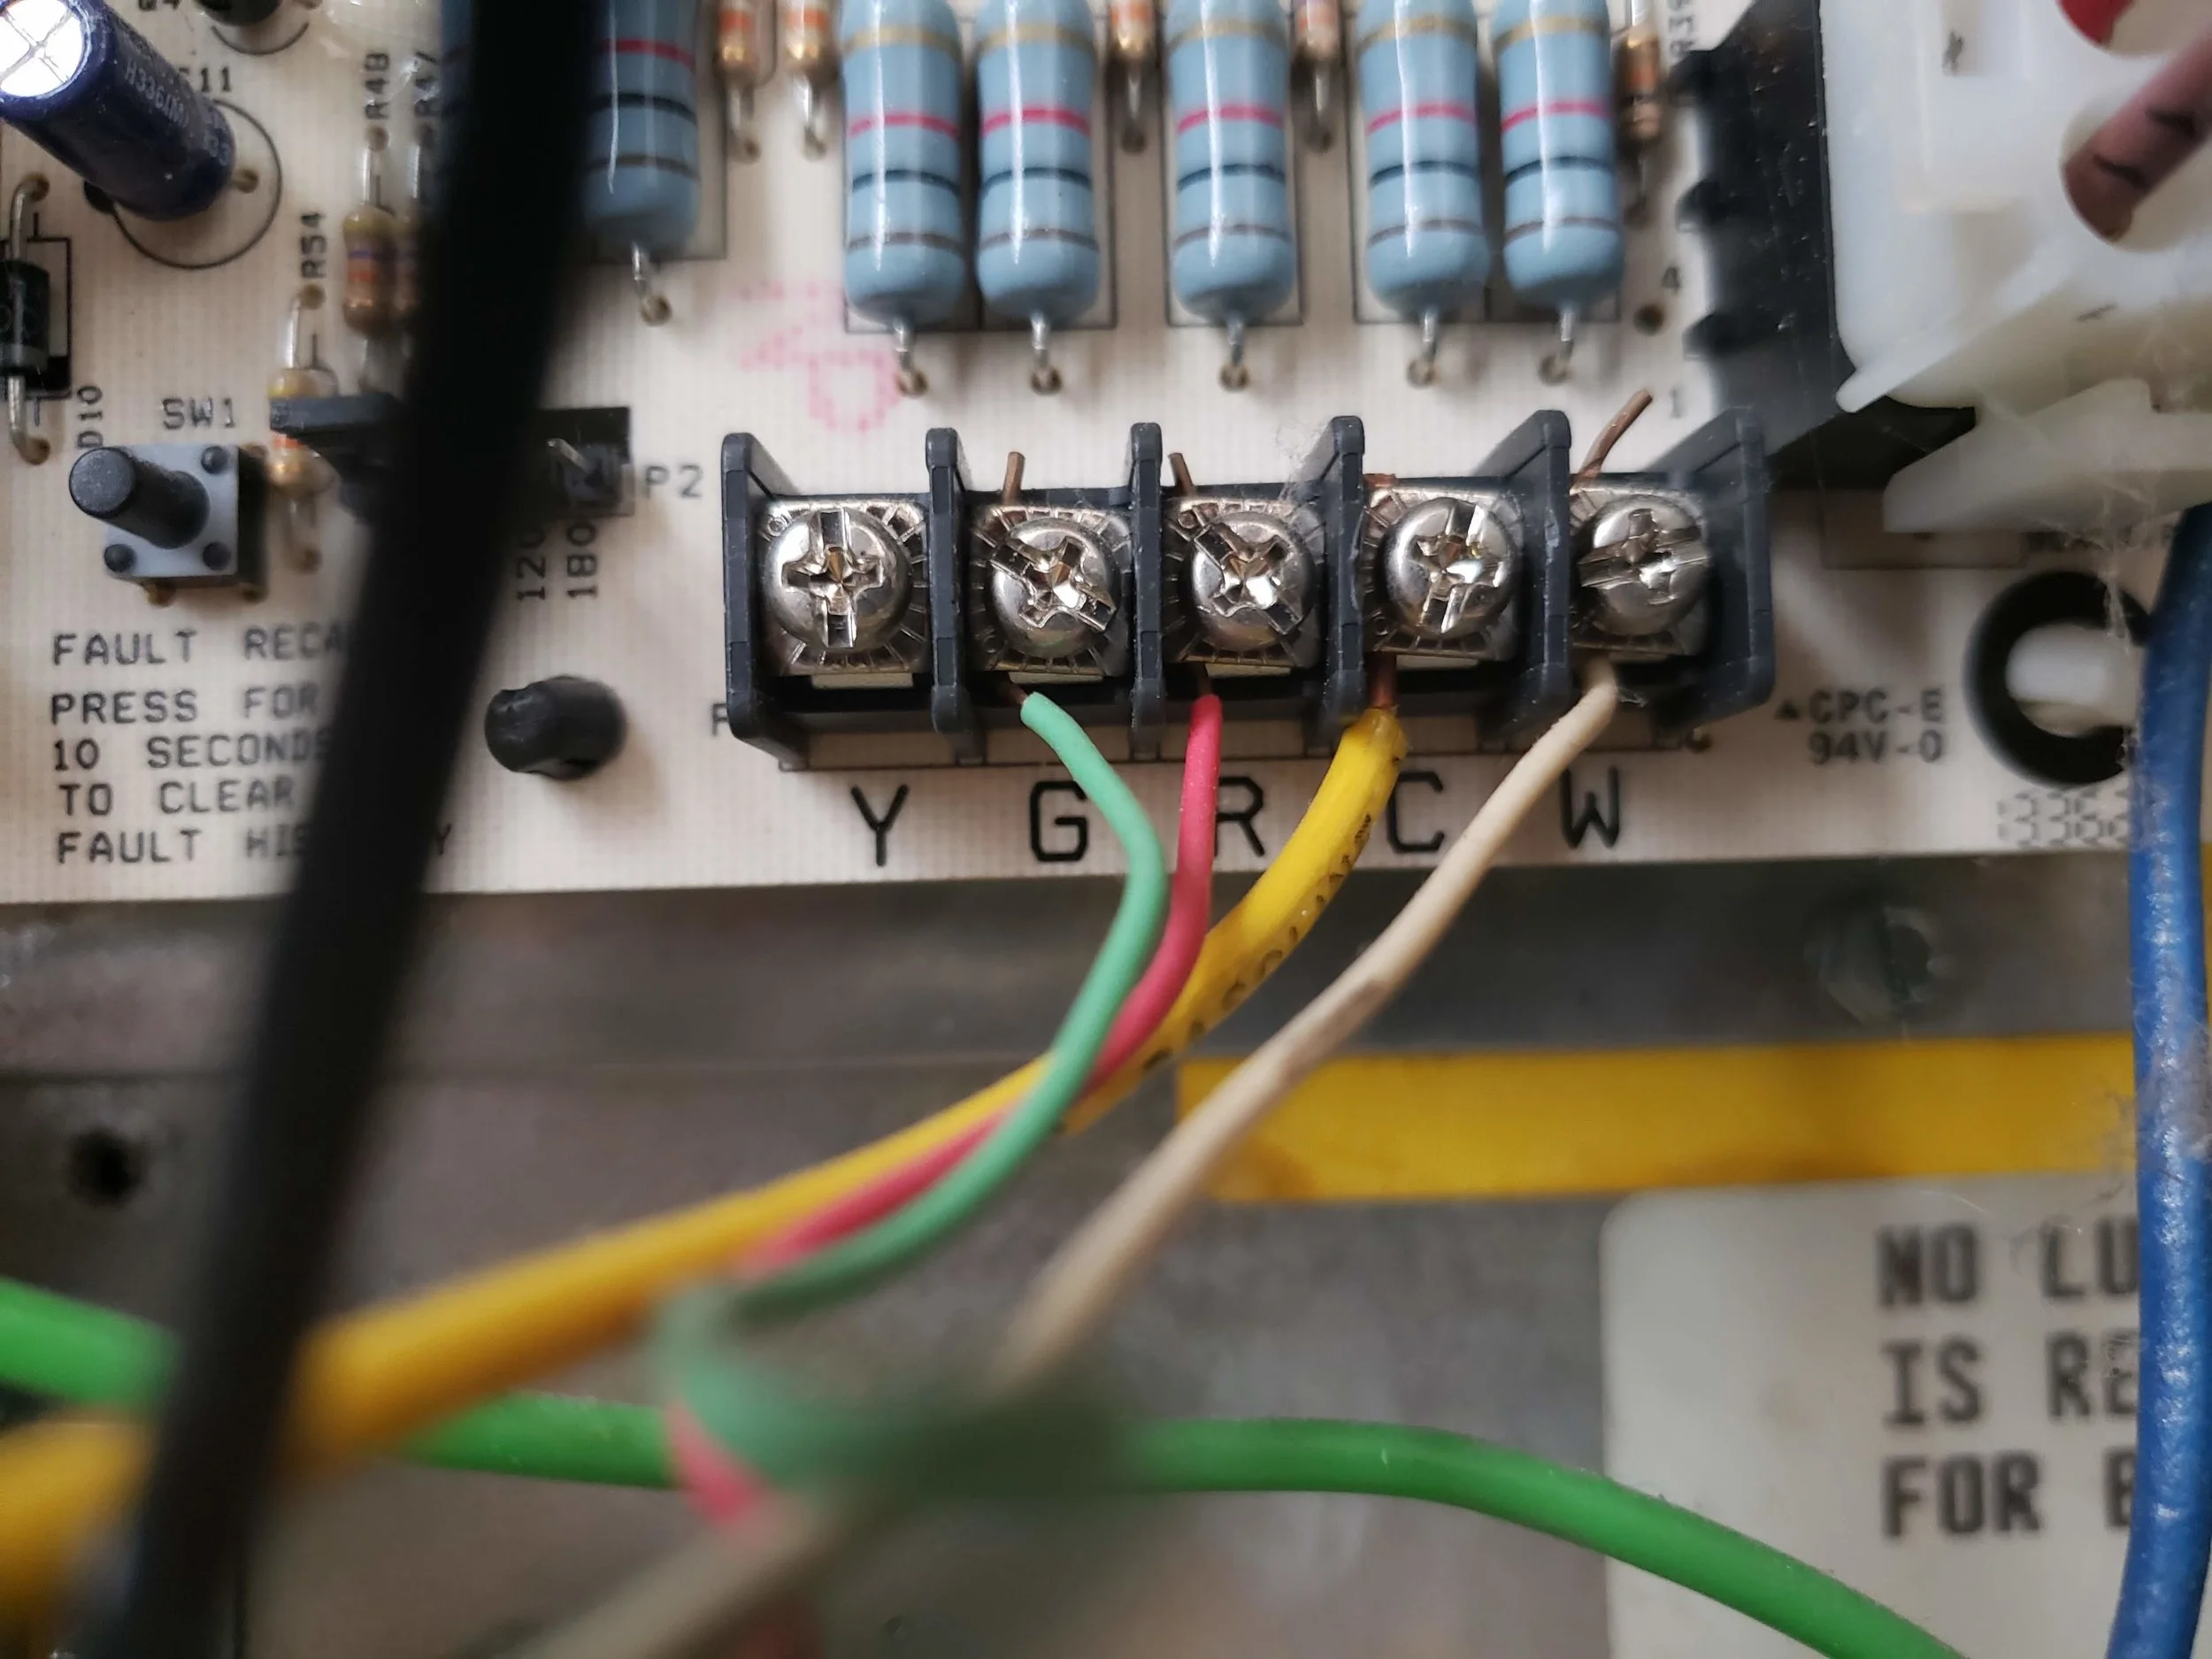
Here we show the thermostats terminals where C wiring would be attached to the Nest Thermostat. Each HVAC system is slightly different, but the lettering conventions are the same across the majority of HVAC systems. This HVAC system has a C wire installed, it’s the yellow wiring shown on the C (Common) wire terminal.
Step 4: Nest Common Wire Installation Nest Thermostat Wiring
With the wire now installed on the HVAC system it is time to connect it to the Nest Thermostat. You will wire the same color wires that you placed on the terminals in the furnace to the Nest Thermostat. So you red R wire on the HVAC system should be wired to the R wire on the thermostat and so on. With the wire that you used for the C wire on the HVAC system you will now wire that into the C terminal on the Nest Thermostat.
Step 5: Nest Common Wire Installation - HVAC Startup
Now that you have all the wiring installed replace the cover on the HVAC system and install the Nest Thermostat on it’s base. When complete turn the Power back on at the HVAC system. Follow the setup menu on the Nest Thermostat and click OK to confirm the common wire is connected. With the common wire now installed on your Nest Thermostat the Nest Thermostat will be receiving constant power and you should not have any low power issues.
Option 2: Nest Common Wire Installation - Install A Transformer
Difficulty: Easy
This is the easiest option and will work for both novices and HVAC pros with minimal amount of work. For this you will need to get a Nest Thermostat Common Wire Transformer. We have tested this 24V transformer from Fyve on multiple installations and know that it will work most furnaces.
The installation of a Nest Thermostat Common Wire Transformer does not involve any wiring inside the furnace and can be done with the screwdriver kit that comes with the Nest Thermostat. Below we have a link to the recommended common wire transformer fo the Nest Thermostat and a picture of the transformer.
Recommended Nest Thermostat Common Wire Transformer from Fyve
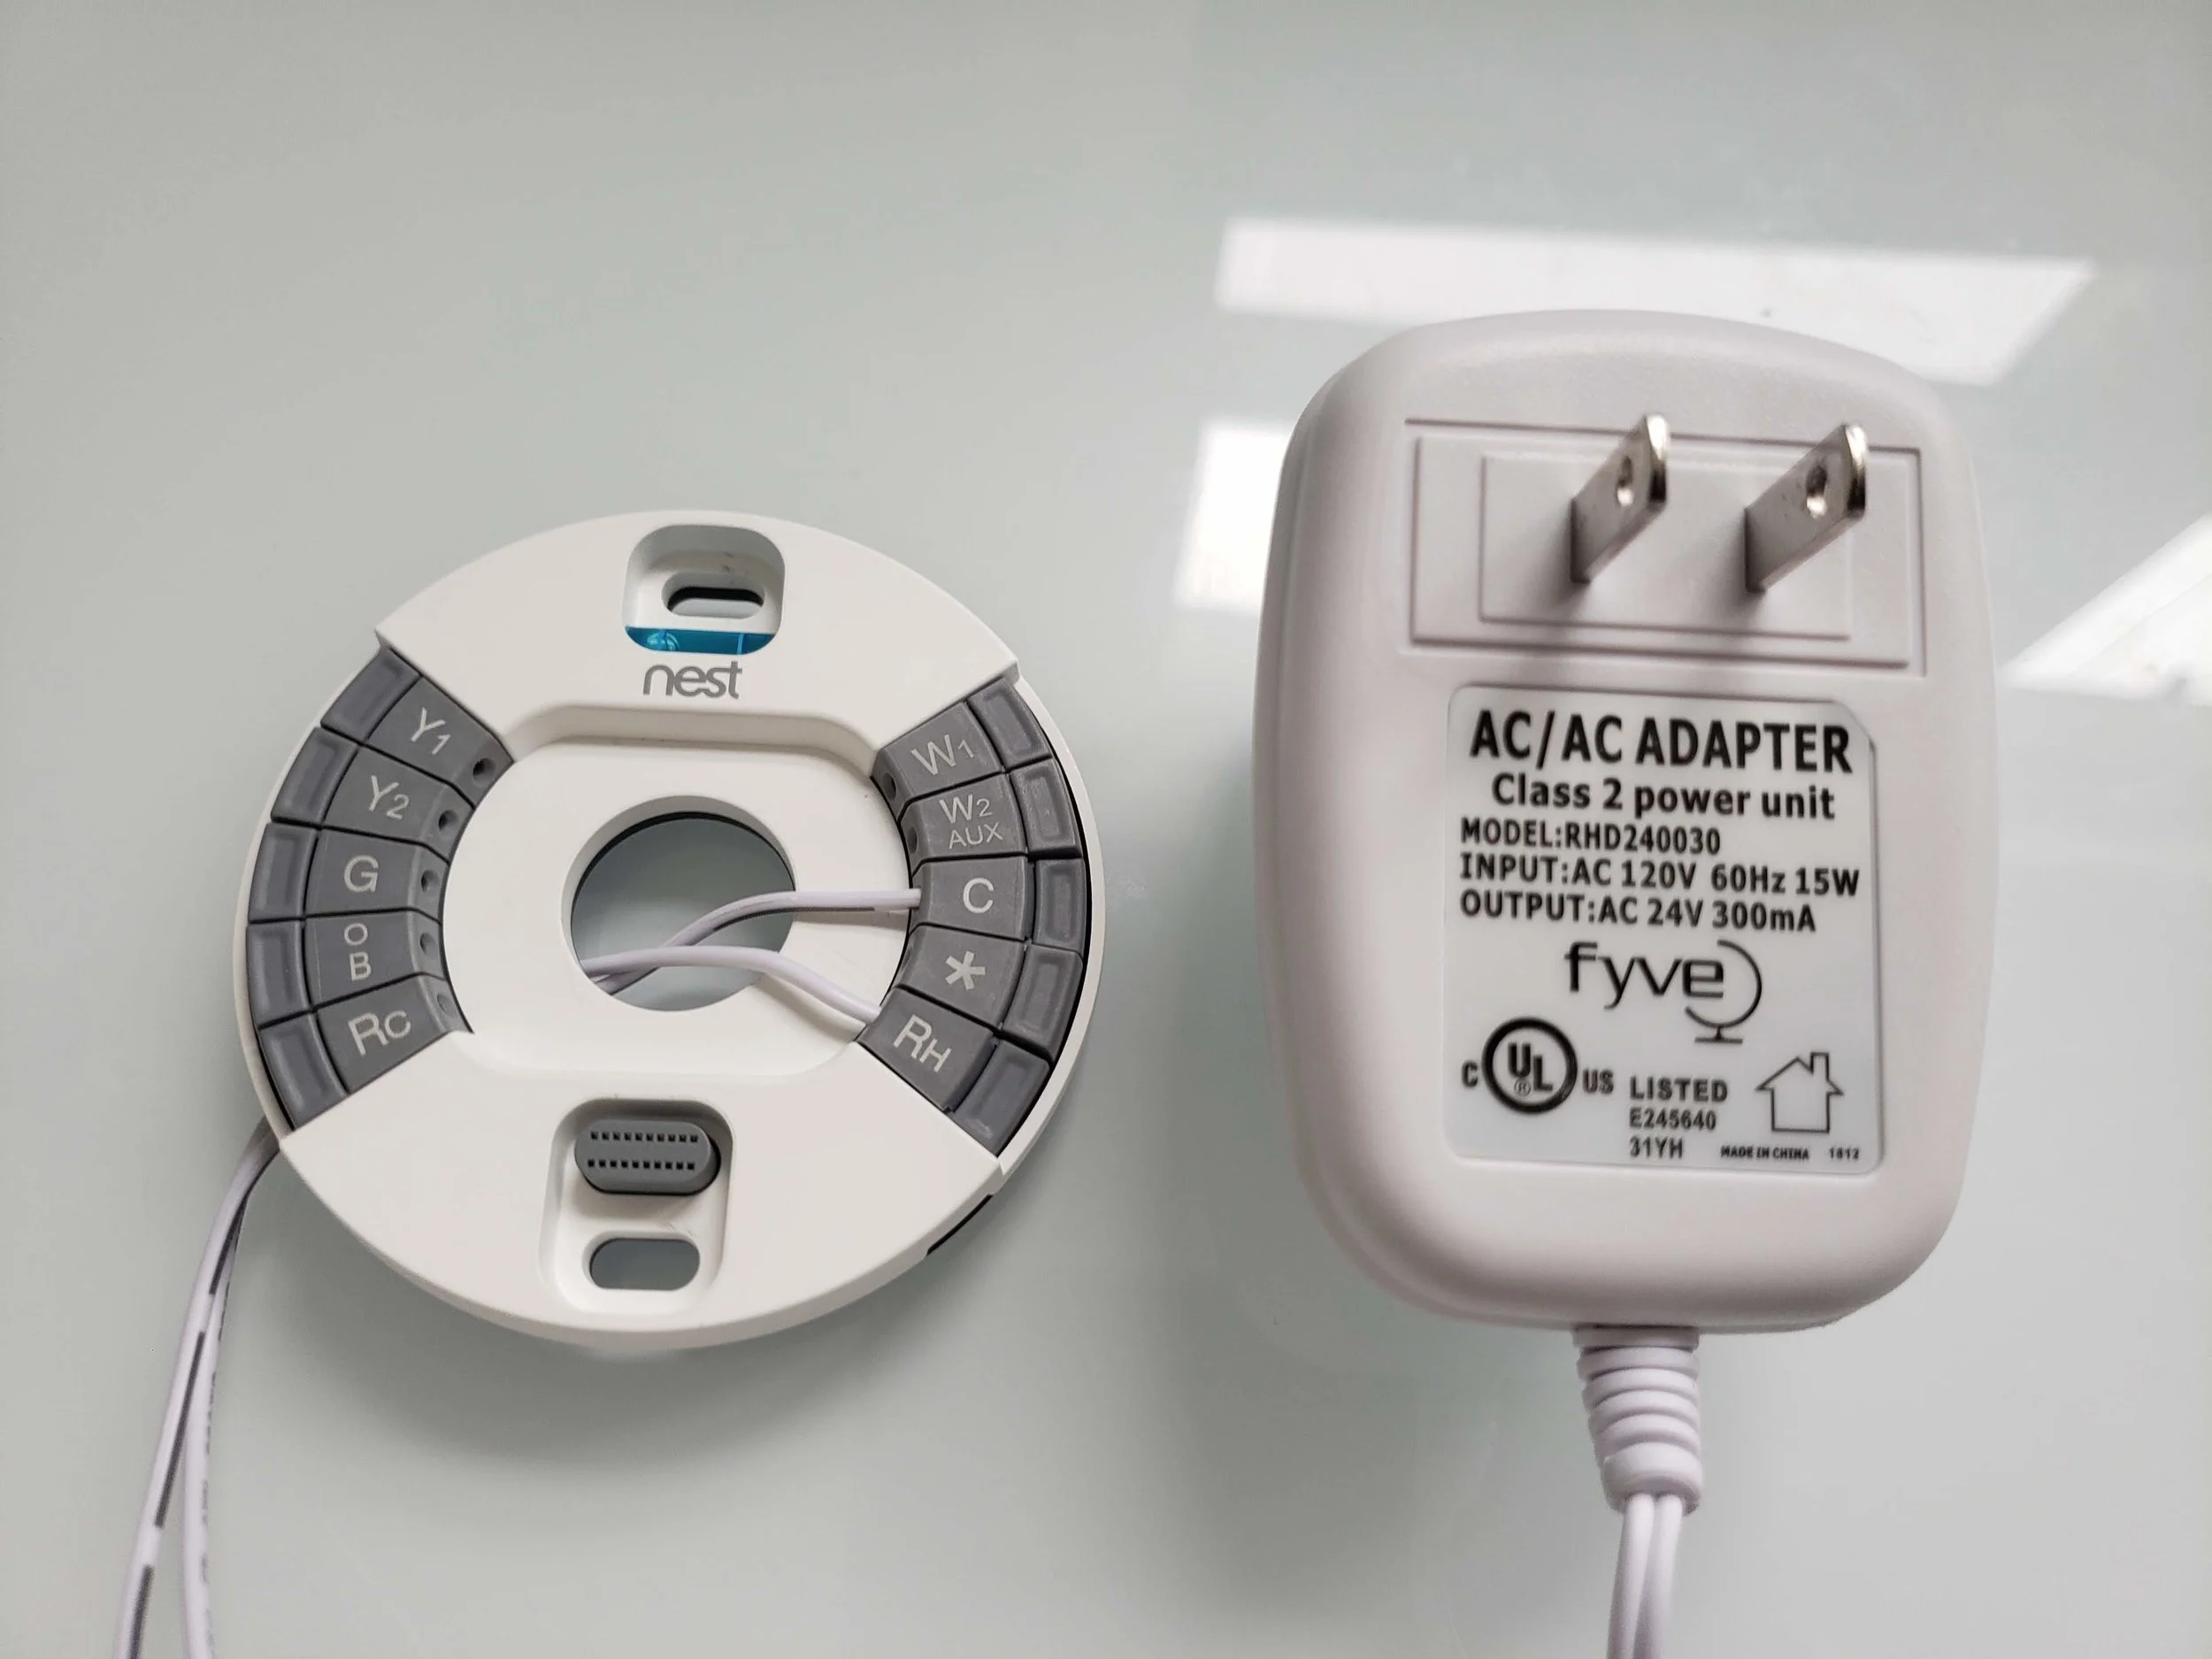
Nest Thermostat Common Wire Installed With Nest C Wire Transformer.
Step 1: Nest Thermostat Common Wire Installation Turn Off Power
Turn off the power for the HVAC system either at the HVAC system or the circuit breaker. Then remove the Nest Thermostat from it’s base and take a picture of your existing wiring. Now remove the existing Rc or Rh wire that you have inserted into the Nest Thermostat. You should cover this old wire with electrical tape and fold it over, and push it out of the way. Make sure you don’t push it too far back into wall, you want it easily reachable with pliers or fingers should you need it.
Step 2: Nest Thermostat Common Wire Installation Install New Transformer
With the power off and the Nest Thermostats Common Wire Transformer Unplugged you will now need to install the new transformer wiring. The easiest method of wiring the new Nest Thermostat Common wire is to surface mount the wires and cover them with low profile wire mold, or cleanly secure them to the wall.
If you want to conceal the wires in wall you can do so but should do it in accordance with local codes and regulations. Oftentimes local codes require the wire be rated for in wall use. So you get in wall rated wire, run it in wall then trim back the Nest Thermostat Common Wire Transformer wiring to the proper length and connect it to the in wall rated wiring.
You will need to route the new wires behind the base so that the Nest thermostat can be reinstalled, to do this you oftentimes only need to loosen the bottom mounting screw and you can run the Common Wires to behind the Nest Thermostat base Plate. You then will connect one wire to Rh and the other wire to the C terminal, as shown below. It does not matter which wire you wire you connect to each terminal as long as they are both securely connected and one wire is in the c terminal and the other is in the Rh terminal.
Step 3: Nest Thermostat Common Wire Installation Re-Install Nest
Now replace the Nest Thermostat on the Nest Base Plate. Turn your HVAC back on and then you can plug in the Nest Common Wire transformer to a standard wall outlet. The Nest Thermostat should now have full power and test your heating and cooling to make sure that it is working.
Recommended Nest Thermostat Common Wire Transformer - One Hour Smart Home Tested
Option 3: Nest Thermostat Common Wire Installation - Hire A Professional
Difficulty: Easy
If you feel uncomfortable running your own wiring or working with your furnace you can always hire a professional for the job. Amazon has local HVAC professional service companies that can come add a Common Wire for you. Just make sure you let them know what kind of thermostat you have and that you want to add a common wire. They will most likely use one of the methods we have listed here and you can always forward them a link on how to install the Nest Common wire if they are unsure of how to do it.
Option 4: Nest Thermostat Common Wire Installation - Install a Resistance Device
Difficulty: Medium - Hard
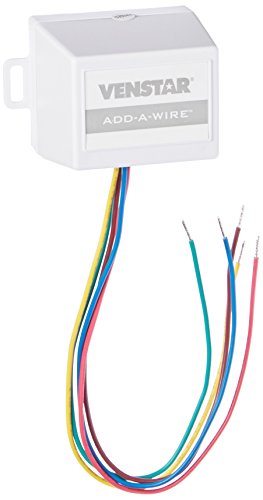
This option will work for some HVAC systems and it won’t work for others. It’s trial and error but we have found that adding a common wire is the most surefire way to fix low power issues. However for some HVAC systems you can add a device like the Venstar Common Wire Adapter. The Venstar adapter is installed inside the HVAC system and allows a traditional 4 wire HVAC system setup to provide enough power to the Nest Thermostat. The installation instructions are straightforward and it’s easy to setup, the only downside is that it does not work with every HVAC system. However if you order from Amazon you can just return it within 30 days if it does not work.
Option 5: Nest Common Wire Installation - Use The Fan Wire As A Common Wire
Difficulty: Medium - Hard
If you have a G wire connected in your thermostat which is used to control your the fan on HVAC systems you can convert your G wire into a C wire in a few simple steps. The G wire is used to provide independent control of the Fan within your HVAC system. If you want to control your fan independently of your AC or heating to circulate air you need a G wire. Most people never use the fan independently of the heating and cooling features of their furnace but some do. This conversion will no longer allow you to independently control the fan for heating and cooling to your home which is a deal breaker for some but won’t matter to others. The fan will automatically kick on whenever you turn on your heat or cooling even without the G wire attached so no need to worry about how your furnace will operate.
Step 1: Nest Common Wire Installation - Use the Fan Wire As A C Wire
Turn off the HVAC system and disconnect the Nest Thermostat from it’s base. Take a picture of the wiring.
Step 2: Nest C Wire Installation - Use The Fan Wire As A C Wire
Take the wire in the G terminal at the Nest Thermostat and relocate it to the C terminal on the Nest Thermostat baseplate.
Step 3: Nest C Wire Installation - Use The Fan Wire As A C Wire
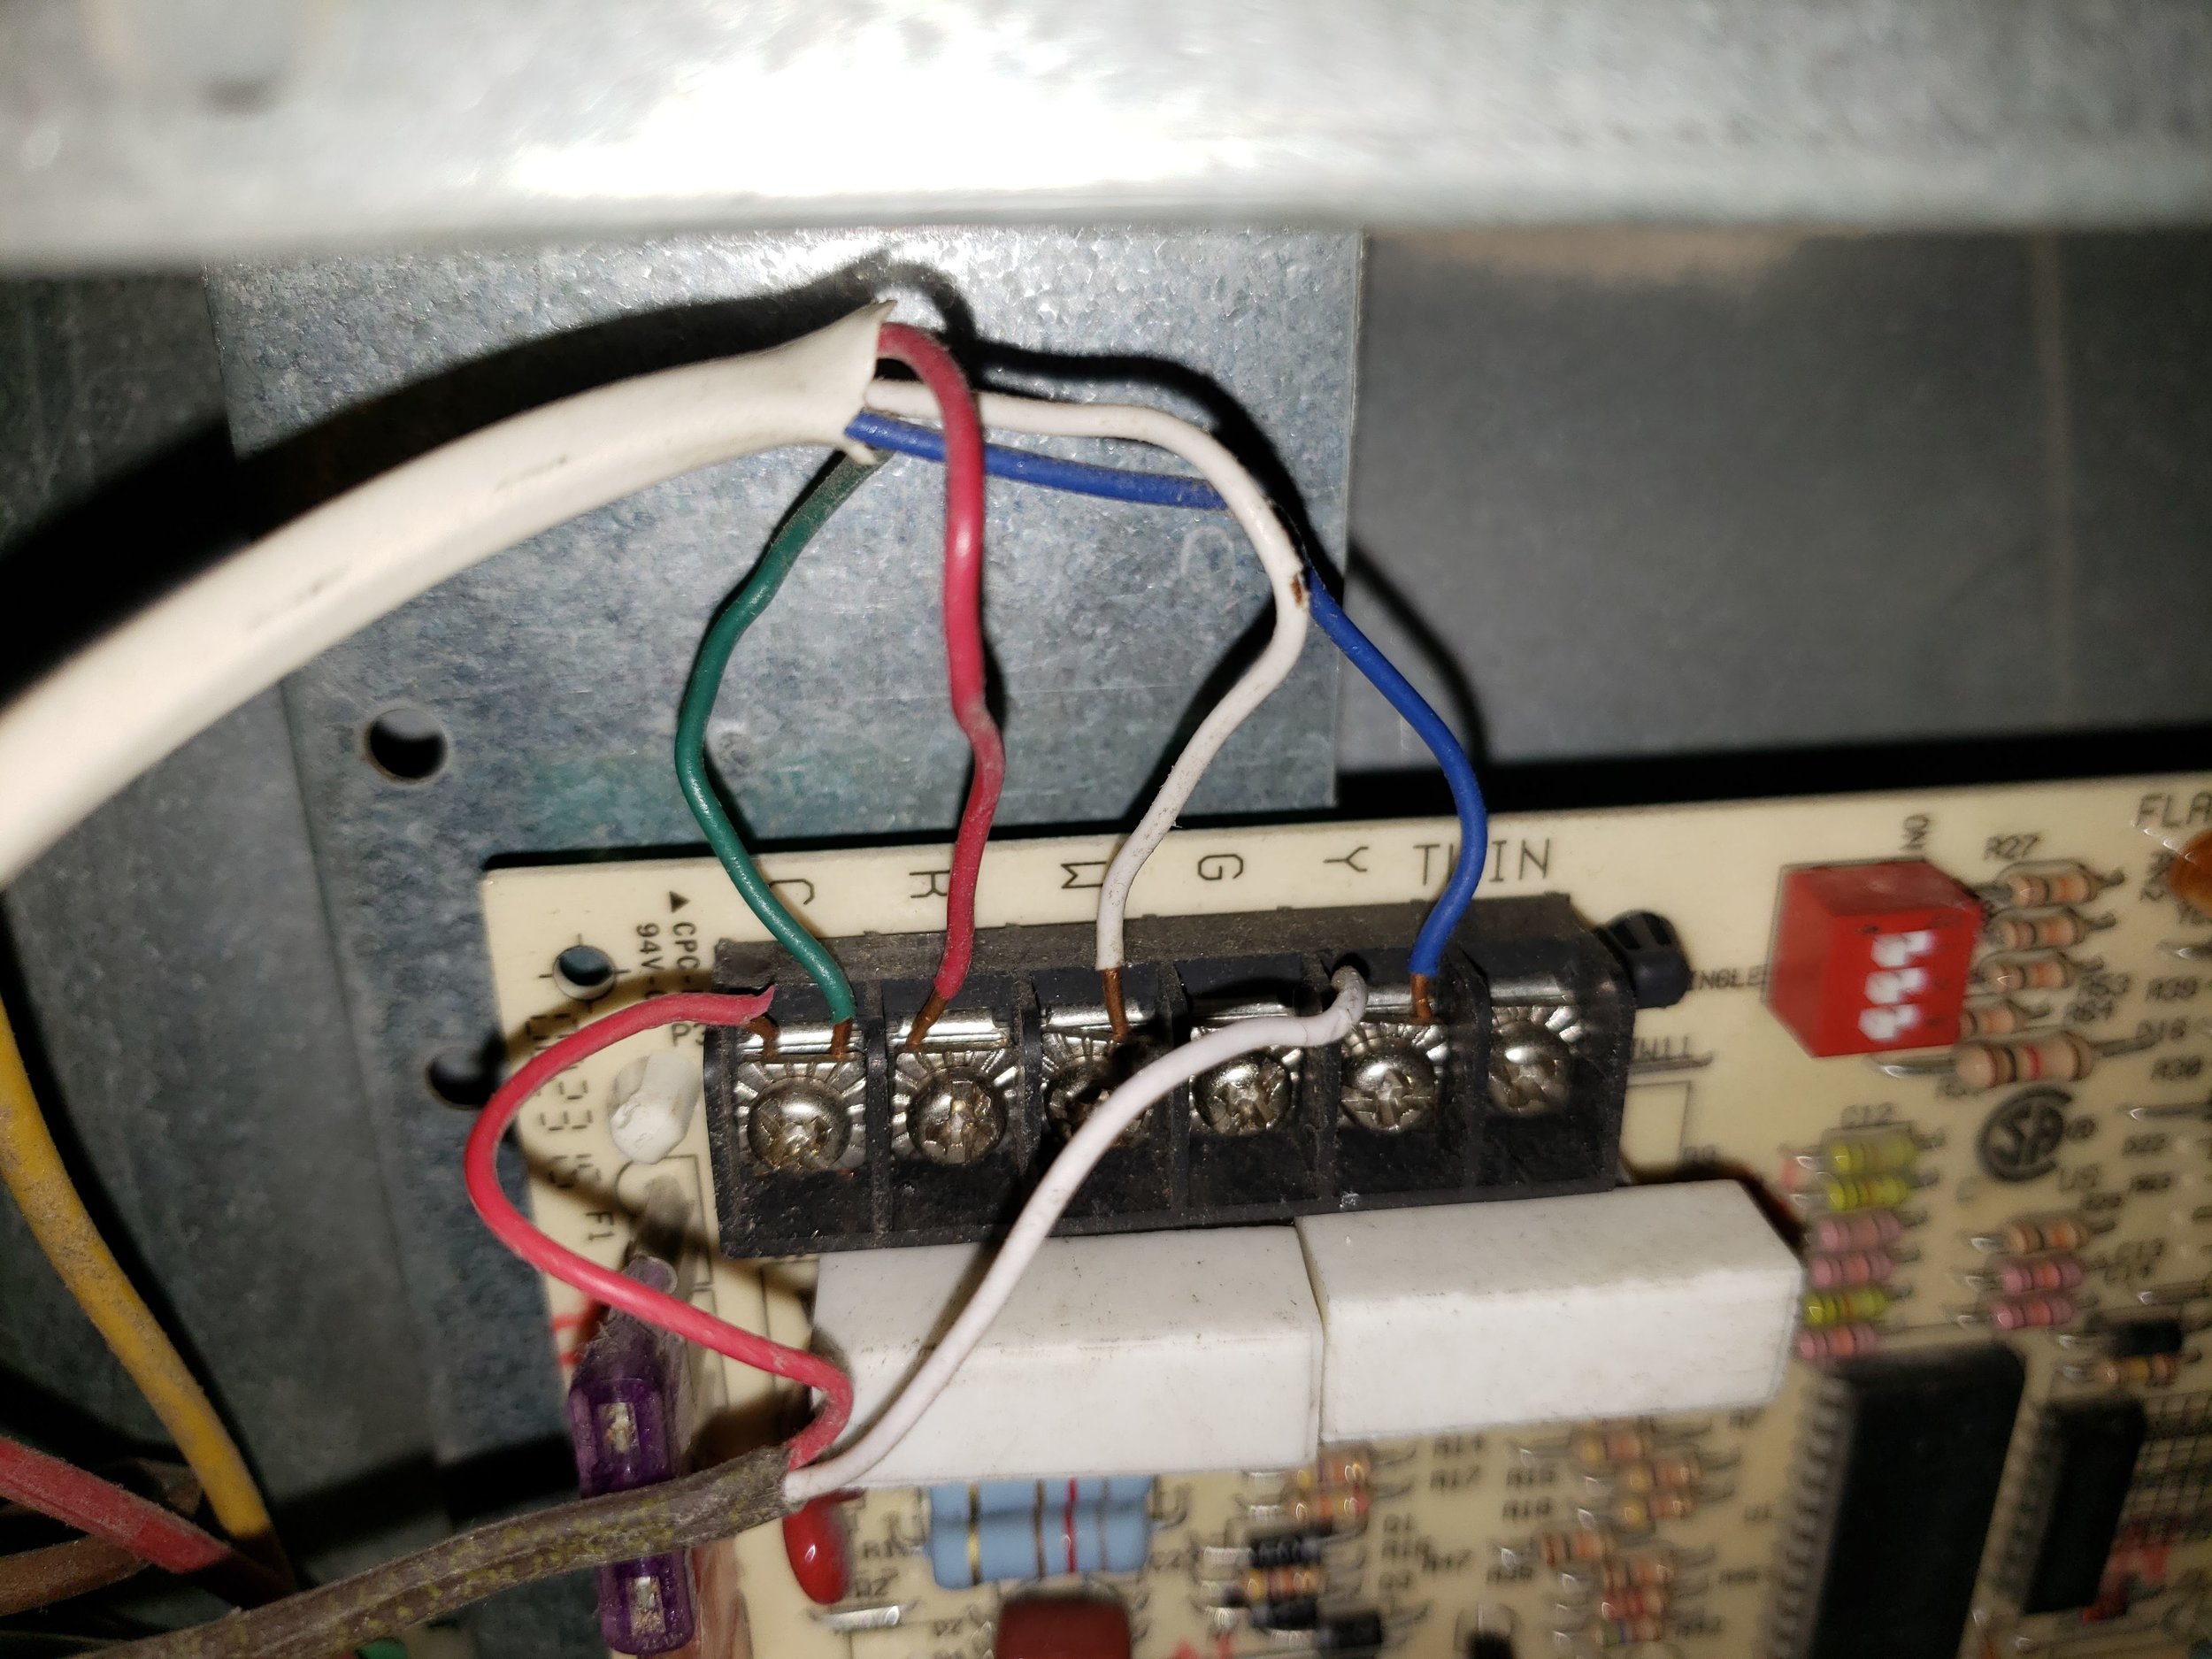
You will now need to go to your HVAC system and open the covers. You will need to locate your circuit board and the terminals that control the thermostat on it. It should look like the picture below. When you find the thermostat terminals you will need to take the wire on the G terminal off and move it to the C terminal. Use a screw driver to carefully loosen the G terminal screw. Don’t unscrew it all the way just a turn or two should loosen the wire enough to pull it loose. You will then need to loosen the C wire terminal screw to place the “old” G wire on C wire terminal. Install the wire on the C terminal as shown below. With the C wire installed tighten the screw, and put the HVAC covers back on.

Step 4: Nest C Wire Installation - Use The Fan Wire As A C Wire
With the C wire now installed should re-install the Nest Thermostat. With the Nest Thermostat re-installed turn the power back on to the HVAC system and follow the instructions on the Nest. Your nest thermostat should now have enough power to work properly.
How To Install A Nest C Wire : Summary
If you need a C wire for your Nest Thermostat there is an installation option that will fit all skill levels. I’ve found that for most people using the Nest C wire transformer is easiest solution as it does not require to open up your HVAC system. If you are a little bit more handy using the fan wire as a C wire is a good option also but it will limit the fan control on your HVAC and you will no longer be able to have independent fan control of your HVAC system if you want to circulate air with the furnace off.
Nest Thermostat FAQ:
Does Nest Thermostat Have A Battery?
Yes, the Nest Thermostat has a built in battery. It is a battery back that is built in internally to the Nest Thermostat. It is not designed to be user serviceable for the average user but it can be replaced. You need to remove the Nest Thermostat from the wall and remove the screws on the back of the nest.
The video below shows how to replace the Nest battery. You will also need the nest replacement battery which is available on amazon.com